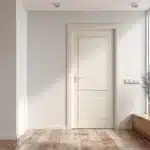
Should Interior Doors Be Removed Before Installation?
Homeowners planning a remodel or simple interior upgrade often ask the same question, should interior doors be removed before installation. The short answer is yes, in nearly every professional installation scenario, the door should be taken off before any real work begins. Removing the door allows the installer to evaluate the opening, correct issues with the frame, and ensure the new door fits, swings, and latches the way it should. Skipping this step is one of the most common causes of sticking, uneven gaps, and long term performance problems. Understanding why removal matters helps you make the best choice for your home and avoid costly mistakes later.
Quick Answer – Yes, Interior Doors Should Usually Be Removed
Interior door replacement works best when installers remove the door at the start of the installation. This applies whether you are replacing an old door with a new door, upgrading style, or correcting long standing issues. Removing the door makes it easier to inspect the existing door frame, confirm the rough opening is square, and verify the door frame is the correct size. It also protects the door, trim, and wall surfaces during construction. While some homeowners hope to save time by working around the existing door, that approach usually creates more problems than it solves.
Why Interior Doors Are Removed Before Installation
Proper Alignment and Fit
A door must sit square within the opening to operate correctly. When installers remove the door, they can measure the width, depth, and height of the opening, then check plumb on each side jamb. This process ensures the hinge side jamb and latch side jamb are aligned properly from floor to head jamb. Even small issues in the frame can cause a door to stick or sit unevenly. Removing the door allows installers to correct those issues before the new door is hung.
Protecting the Door and Frame
During installation, tools like a hammer, drill, screws, nails, and shims are constantly in use. Leaving a door in place increases the chance of damage to the door surface, hinge mortises, and trim. Painted or finished doors are especially vulnerable. By taking time to remove the door, installers reduce the risk of scratches, dents, or chipped paint and keep the frame clean and flush.
Easier Adjustments and Corrections
Very few openings are perfect, especially in older homes where the floor may not be level and the wall may not be plumb. Removing the door makes it easier to inspect the rough opening, adjust shims, and secure the frame in the correct position. Installers can pull the frame tight, fill gaps, and adjust the jambs until the opening is square. This level of precision is difficult to achieve when working around an existing door.
Installer Safety and Jobsite Control
A hanging door can swing unexpectedly, block access, or stress the hinge side. Removing the door improves safety, gives installers more space to work, and allows better control of tools and materials during installation.
Pre-Hung Doors vs Slab Doors, What’s the Difference?
What Is a Pre-Hung Interior Door?
A pre-hung interior door comes already attached to a frame, complete with hinge placement set at the factory. Installing this type of door always requires removing the old door and the existing door frame. The rough opening must be clear so the new frame can be positioned, shimmed, and secured properly. Pre-hung doors are often the best choice during remodels or when the existing door frame is damaged or out of square.
What Is a Slab Door?
A slab door, sometimes called a blank door before prep, is just the door itself without hinges or a frame attached. Slab replacement can work when the existing door frame is in good condition. Even then, installers must remove the old door, mark hinge locations, cut hinge mortises, and ensure the hinge side jamb and latch side jamb line up correctly. Leaving the old door in place prevents accurate measurements and leads to poor results.
Which Option Is Better for Your Home?
Choosing between a slab and a pre-hung door depends on the condition of the frame, the age of the home, and the desired finish. If the existing door frame is square, plumb, and secure, a slab door may be the best choice. If there are issues with the opening, trim, or jambs, a pre-hung door offers a cleaner, more reliable solution.
Can You Install an Interior Door Without Removing the Old One?
Situations Where Homeowners Ask This Question
Homeowners often ask this when trying to speed up a project or reduce installation costs. Some believe they can simply attach a new door to existing hinges or slide it into position without fully removing the door.
Why This Approach Usually Fails
Installing a door without removing the old door limits access to the frame, hinge side, and latch side. It becomes difficult to measure accurately, adjust shims, or secure the frame. Screw holes may not line up, hinges may bind, and the latch may not sit centered in the strike plate. Over time, these small issues lead to sticking, blocked movement, and premature wear.
Rare Exceptions Where Removal May Not Be Necessary
Minor hardware changes or surface repairs may not require full removal. However, for any true replacement or installation, professionals still remove the door to ensure quality results.
Step-by-Step Overview, How Professionals Install Interior Doors
Step 1 | Door Removal and Opening Inspection
The first step is always to remove the door. Installers use a utility knife to score paint along the trim, then remove hinge pins and carefully pull the door free. With the door removed, they inspect the existing door frame, side jambs, head jamb, and floor for damage or movement.
Step 2 | Frame and Rough Opening Prep
Next, the rough opening is checked for square, plumb, and correct size. Shims are placed behind the jamb at hinge points and along the latch side to keep everything aligned. Nails or screws are used to secure the frame while adjustments are made. This step ensures the frame sits flush with the wall surface.
Step 3 | Hanging and Alignment
Once the frame is secure, the new door is positioned and hung on the hinge side. Installers check swing, gap spacing, and latch alignment. The door should sit centered in the opening with even gaps along the jamb and head jamb. Adjustments are made as needed before final fastening.
Step 4 | Finishing and Hardware Installation
Trim and casing are installed, nail holes are filled, and paint or touch ups are completed. Hardware such as hinges, latch, and handles are installed and tested. The door should open, close, and latch smoothly without resistance.
Common Problems Caused by Skipping Door Removal
Doors That Don’t Latch or Stay Closed
If the latch side jamb is not aligned, the latch may miss the strike plate. This causes the door to pop open or refuse to stay closed.
Uneven Gaps and Poor Appearance
Skipping removal often results in uneven gaps around the door. These gaps are noticeable and difficult to fix after installation is complete.
Premature Hinge Wear
When a door hangs out of square, extra stress is placed on the hinge. Over time, this leads to loose screws, enlarged holes, and sagging.
Increased Long-Term Repair Costs
Fixing a poorly installed door often requires removing trim, filling holes, and reworking the frame. This costs more than doing it right the first time.
Interior Door Installation in Older Homes
Settling, Framing Shifts, and Uneven Floors
Older homes commonly have floors that slope and walls that are not plumb. These conditions affect how a door sits in the opening.
Why Removal Is Even More Critical in Older Properties
Removing the door allows installers to inspect deep framing issues, adjust shims, and secure the frame in a stable position. This prevents sticking and blocked movement in the future.
Custom Solutions vs Off-the-Shelf Doors
Older homes may require custom sizing or adjustments to ensure the door fits the opening correctly and sits flush with existing trim.
DIY vs Professional Interior Door Installation
When DIY Might Make Sense
Experienced homeowners may handle simple slab replacements when the opening is square and the frame is in good condition.
Risks of DIY Door Installation
Common DIY mistakes include misaligned hinges, uneven gaps, stripped screw holes, and damage to trim or drywall.
Why Homeowners Choose Elevate Construction Group
Professional installers bring experience, proper tools, and attention to detail that ensures every door fits, swings, and latches correctly, and companies like Elevate Construction Group’s window and door installation services also provide warranties, financing options, and long-term support for your project.
Cost Considerations, Does Removing Doors Increase the Price?
Labor Time Breakdown
Removing a door adds minimal time to the overall installation and is standard practice.
Cost of Fixing Mistakes vs Doing It Right
Correcting errors caused by skipping removal often requires more labor and materials.
Value of Professional Installation
Quality installation protects the door, frame, and future performance.
FAQs About Interior Door Installation
Do interior doors need to be removed to replace hinges?
For full replacement, yes. For minor hinge repairs, removal is still recommended.
Can you replace an interior door without removing trim?
In some cases trim can remain, but the door itself should be removed.
How long does it take to replace an interior door?
Most installations are completed within a few hours.
Should I replace door frames when installing new doors?
Frames should be replaced if damaged or out of square.
What’s the best time during a remodel to replace doors?
After flooring and before final paint.
Can interior doors be reused after removal?
Yes, if stored properly and in good condition.
Final Verdict, Remove the Door for the Best Results
Removing the door before installation is not an extra step, it is the correct step. It allows installers to measure accurately, secure the frame, and ensure long term performance. Skipping removal often leads to sticking, uneven gaps, and future repairs. When quality, durability, and appearance matter, removing the door is always the best choice.
Ready to Upgrade Your Interior Doors?
If you are planning to replace interior doors, proper installation makes all the difference. A professional approach ensures the door fits the opening, aligns with the frame, and performs smoothly for years to come.